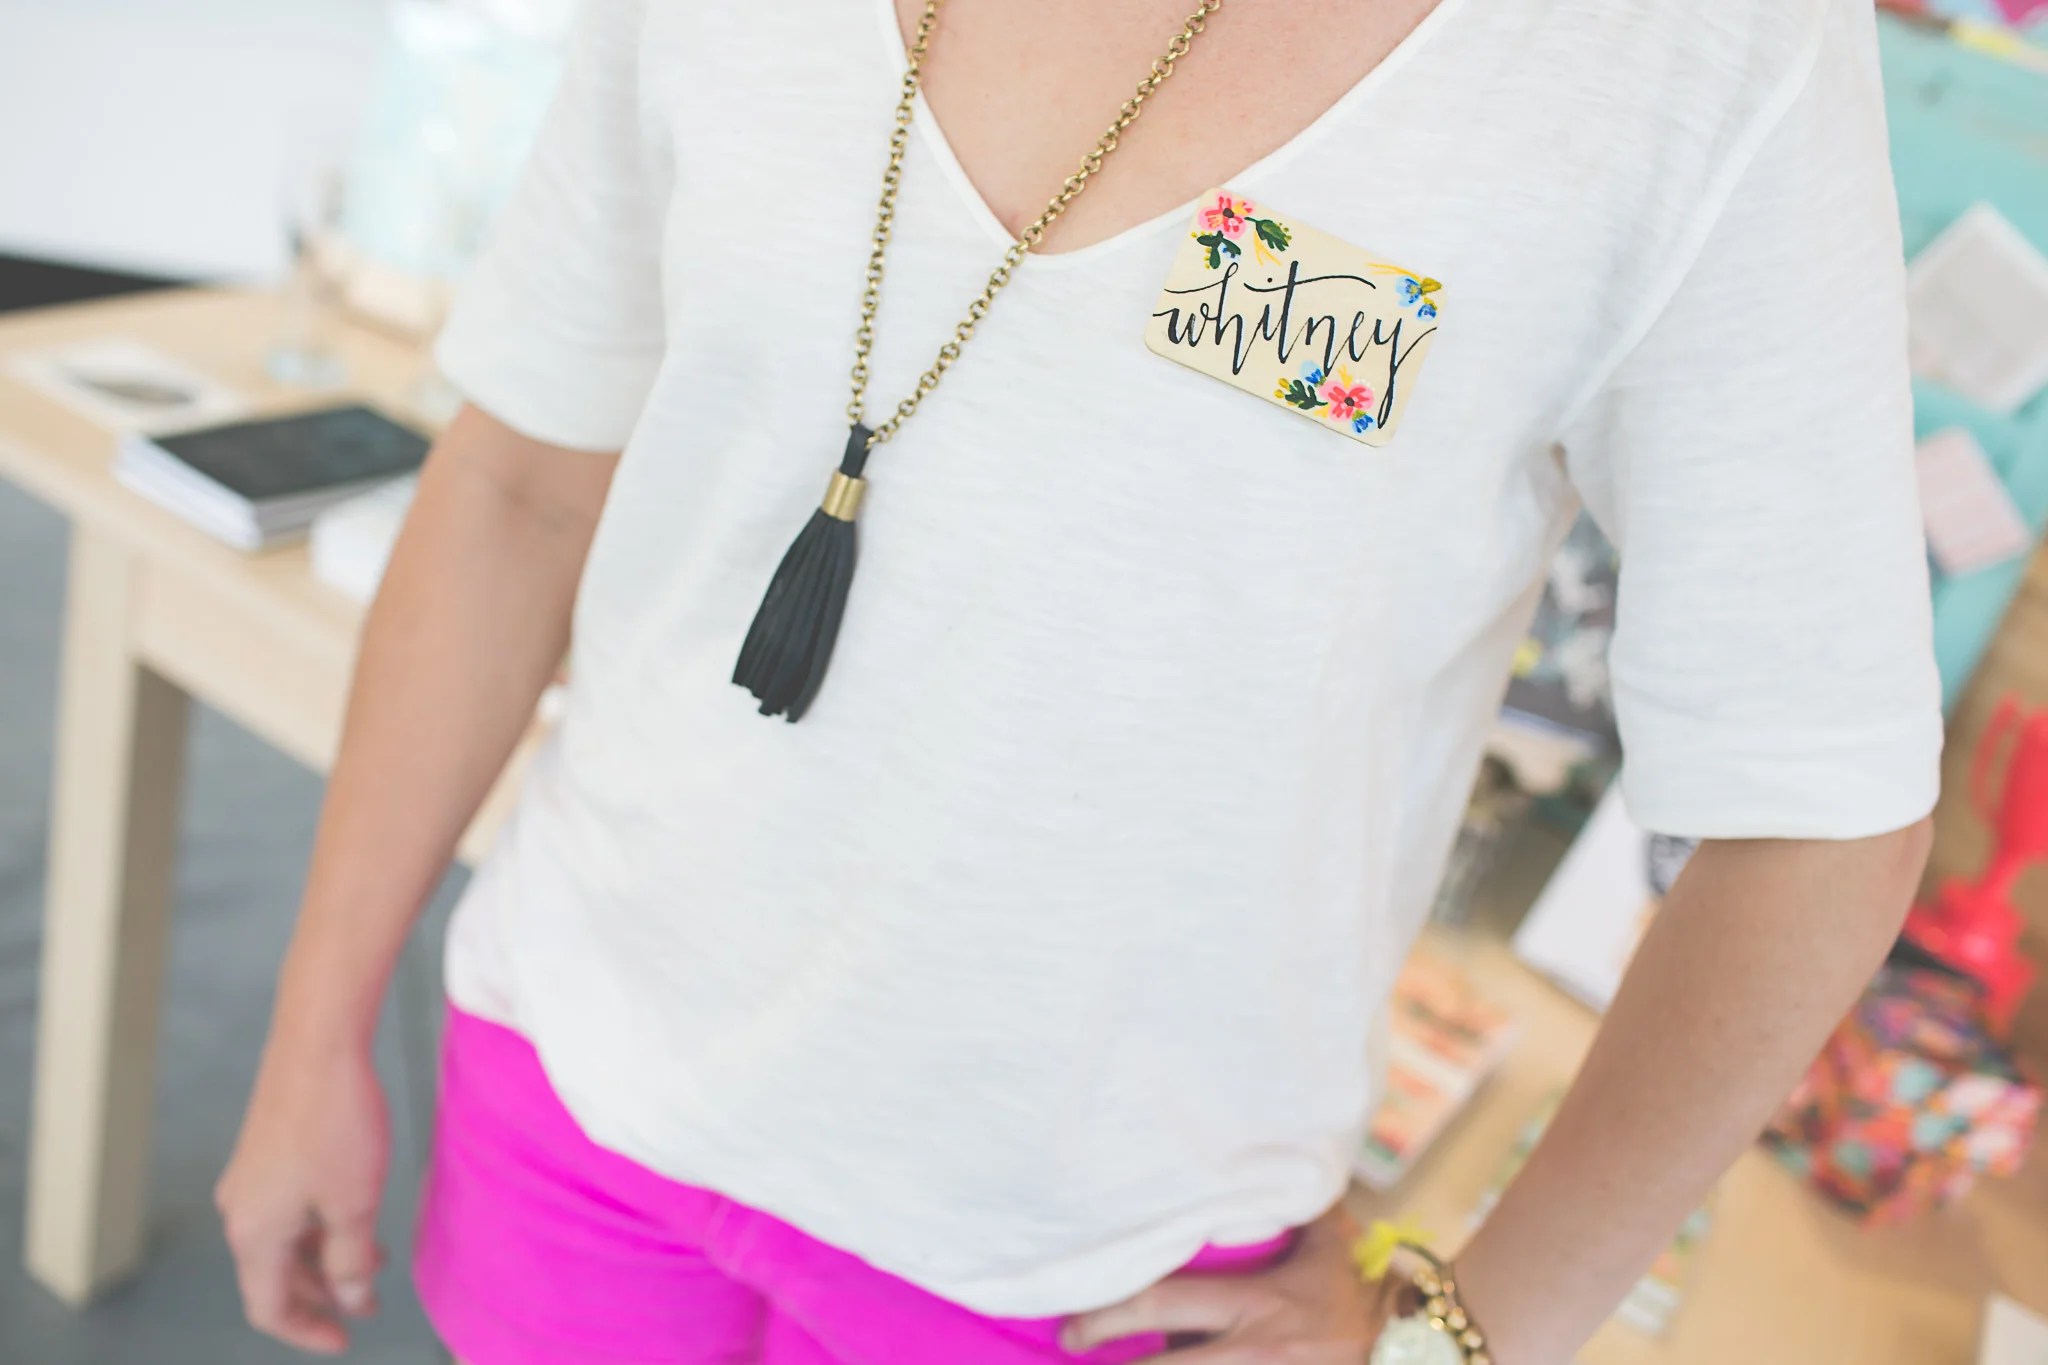
If you have been in our store recently, you have probably noticed our super cute, new name tags! Just like everything in our store, we wanted something beautiful, hand-crafted and unique. Lucky for you- they are EASY and you don’t have to be an artist or calligrapher to make them for yourself. And the technique can be applied to many different crafts, not necessarily just name badges. SO get creative and make sure you share your awesomeness on Instagram (tag @paperieandpen #radpaperhowto)
Okay- let’s get started! What do you need?
Wood name badges, or whatever blank surface you are using for your craft
Acrylic Spray
Acrylic Paints & Brushes (craft paints are perfect)
Pencil
Calligraphy Pen & Ink *or* Permanent Marker
Name Badge Magnets (available on Amazon.com)
Optional: If you are not the best “free hander,” use a computer to print out the names in the size and font you want for the first steps. If you are a good “free hander”…good for you!
Start by spraying a few coats of the acrylic spray on the wood badges. This will make it so your ink doesn’t bleed into the woodgrain.If you need to “hack” your calligraphy- lay out your favorite font in the size you would like to use. You can do this is many programs- including Word and Pages which is on every computer. If you have Photoshop or Illustrator, that works too!Print out on regular printer paper (do not ‘fit to page’)use the side of your pencil to create a ‘carbon paper’ (if you would rather use actual carbon paper- that works great too) only worry about laying the pencil on the areas with printing.Lay the paper down on your wood (pencil-side-down) and trace over the printed words with a ballpoint pen, or with the pencil you were just using. This will transfer a light outline onto your surface.Use a calligraphy pen or permanent marker to trace over your pencil marks. Refer to your print out and note where your thicks and thins are in each letterform. In calligraphy, your downstrokes will be thick and your upstrokes thin. If you are a beginner, it is sometimes easier to write thinly and go back to thicken the downstroke areas- especially if you are using a marker. Once you have all of your names written- you can add a little detail (I added a little silver ink to the letters to help clean up some of my lines and add some dimension) Now- time to add flowers! I added some simple flower ‘blobs’ (the flower style that is popular right now is very simple- so don’t overthink!)Time to add greenery- start with a dark green to make stems and leaves in the places you want them. If you want to make more buds in different colors, this is a good opportunity to plot our where you want these to go.Add the buds to the places you planned. To add some dimension, add some darks to the centers of the first flowers you created- and some light greens to the leafy areas.Add flower centers, and any other special finishing touches. I added some metallic gold detail with a calligraphy pen and ink to give a little bit of sparkle. Make it your own!Give the lot a nice thorough spray with your clear acrylic. I used a glossy finish and did about 3 good coats letting them dry in between.Here they are! Each one special in it’s own way. Just stick your magnets on the back/top if you are using these as name badges- and VOILA!!!And now that each of our employees will be getting their own special, hand-painted name tag….it will take time. SO I had a brilliant idea for when we hire someone new! (this one I DID free-hand without any print out or transfer, so if you feel confident- give it a GO with your own handwriting?) And no, we aren’t opposed to hiring ‘new guy’s–I just figure they might want a more masculine look anyway- and that is a whole notha’ DIY!!!HOPE YOU ENJOYED THIS ‘HOW TO’ —we can’t wait to see yours! Instagram (tag @paperieandpen #radpaperhowto)
PAPERIE + PEN IS A LOCAL BUSINESS DREAMT UP BY FRANNIE AND NICHOLE, BOISE NATIVES WITH A LOVE FOR PAPER AND DESIGN. DRIVEN BY THEIR PREVIOUS DESIGN AND PHOTOGRAPHY STUDIO THAT THEY STARTED IN 2009, FRAN AN NIC FOUND THAT THEY ESPECIALLY LOVED WORKING WITH BRIDES AND COUPLES ON WEDDING INVITATIONS AND PAPER GOODS. BRANCHING OFF OF THE PARENT COMPANY, A PAPER STORE WAS BORN. A RETAIL ENVIRONMENT WHERE OTHER LIKE-MINDED-PAPER-LOVERS COULD FIND HAVEN AND SWOON OVER THE TANGIBLE TEXTURES OF LETTERPRESS AND THE SCENT OF FRESHLY MINTED PRINTING. HAVE YOU HEARD? THERE'S A MOVEMENT GOING ON- THE ANTI TECHNOLOGY, LET'S GET BACK TO REALITY, HAVE HUMAN INTERACTIONS AND SEND A LETTER. PUT A PEN TO PAPER. TOUCH AND FEEL THE SENTIMENT OF PERSONALIZED STATIONERY THAT ONCE WAS. IT'S MAKING A WORLDWIDE COMEBACK AND THE GIRLS WITH P+P ARE BRINGING IT TO THE TREASURE VALLEY! Shop Online: paperieandpen.com
View all posts by Paperie + Pen
This is A M A Z I N G !
When using the font and placing individual names on the page to print, do you wrap the text first? How did you get the names in the individual boxes, if I may ask?
I have made invitations before using a border but the words fit into the border… they did not remain my regular size with the box merely a “format” for the text.
Thank you! :))))
LikeLike